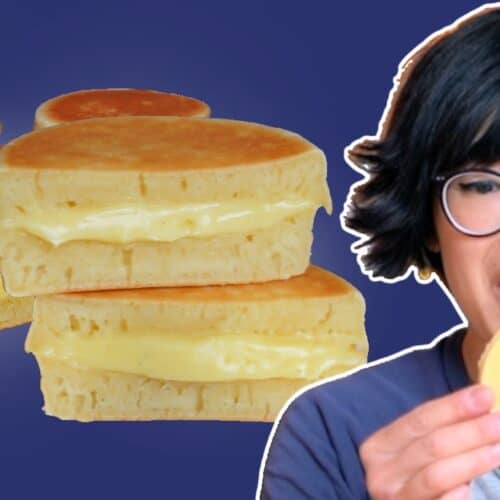
Today, I’m excited to share a special treat that brings a bit of Japanese street food magic right to your kitchen—imagawayaki, also known as wheel cakes!
I recently dusted off a unique pan I’d been saving just for this purpose: perfect for creating these delightful, portable goodies. Imagine the joy of biting into a warm, fluffy cake with a sweet surprise inside—whether it’s a rich vanilla custard or traditional red bean paste.
These wheel cakes remind me of my time living in Japan when I’d hop on my bike and grab a batch from a local vendor after work. Now, with a little help from Table Diary’s recipe, I’m recreating that nostalgic experience with a delicious twist.
So, let’s get cooking and make some delicious Imagawayaki! 🍰✨

Imagawayaki – Wheel Cakes
Toasted round treats that sandwich a creamy custard or sweetened bean filling.
Equipment
- wheel cake pan
Ingredients
Custard
- 3 egg yolks
- 1⅓ C. whole milk
- 4 tbsp. sugar
- 1/2 tsp. vanilla paste vanilla extract
Batter
- 1¼ C. all-purpose flour
- 2 eggs
- 6 oz. whole milk
- 4 tbsp. sugar
- 3/4 tsp. Kosher salt
- 3 tbsp. vegetable oil any neutral flavored oil is fine
- 1 tsp. baking powder
- 6 tsp. prepared red bean paste (optional)
Instructions
Prepare the Vanilla Custard
- In a bowl, whisk together the egg yolks and sugar until well combined.
- Add the cornstarch and mix until smooth.
- In a saucepan, heat the milk and vanilla paste until small bubbles form around the edges. Do not boil.
- Gradually add the hot milk to the egg mixture, stirring constantly to temper the eggs.
- Return the mixture to the saucepan and cook over medium heat, stirring constantly, until the custard thickens (it should come to a full boil to activate the cornstarch).
- Transfer the custard to a bowl, cover with plastic wrap, and cool in the refrigerator or set outside to chill.
Make the Batter
- In a large bowl, whisk together the eggs, sugar, and salt.
- Gradually add the milk, mixing until combined.
- In a separate bowl, sift together the flour and baking powder.
- Add the dry ingredients to the wet ingredients and mix until smooth.
- Stir in the oil.
Cook the Imagawayaki
- Preheat your wheel cake pan over low heat.
- Lightly oil the pan using a paper towel to ensure easy release.
- Pour the batter into each divot, filling them about halfway.
- Add a spoonful of vanilla custard or red bean paste into the center of each divot.
- Carefully pour more batter on top to cover the filling.
- Cook on low heat until the cakes are golden brown and cooked through, about 3-4 minutes per side. You may need to flip them to ensure even cooking.
Finish and Serve
- Remove the wheel cakes from the pan and let them cool slightly before serving.
- Enjoy warm with a cup of coffee or tea!
Notes
Nutrition
Calories: 435kcalCarbohydrates: 65gProtein: 11gFat: 14gSaturated Fat: 4gPolyunsaturated Fat: 5gMonounsaturated Fat: 4gTrans Fat: 0.1gCholesterol: 161mgSodium: 383mgPotassium: 205mgFiber: 1gSugar: 26gVitamin A: 340IUCalcium: 176mgIron: 3mg
Tried this recipe?Let us know how it was!